
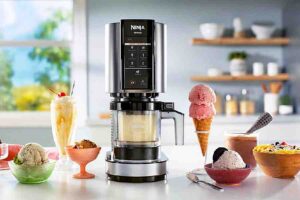
Making your own ice cream at home is incredibly enjoyable. An Ice Cream Maker Machine turns simple ingredients into a delightful frozen treat with little work, whether you’re in the mood for a traditional vanilla, a rich chocolate, or a cooling fruit sorbet. The churning and freezing procedures, which are challenging to reproduce by hand, are handled by these appliances, resulting in a smooth, creamy texture that is much better than most store-bought alternatives. There is an ice cream maker for every kitchen and budget, from small ones for rare pleasures to professional ones for frequent use. This guide outlines simple dessert recipes using an ice cream machine, allowing you to maximise the usage of your equipment and savor homemade frozen treats throughout the year.
Pick the Appropriate Ice Cream Maker
Choosing the right gadget for your needs is the first step toward creating simple desserts. There are three major types: compressor models, pre-freeze bowl models, and hand-crank machines. Bowl-freezing models are inexpensive, but you must plan ahead of time because you must freeze the bowl for 12 to 24 hours before using it. Compressor models include a built-in freezing mechanism, allowing you to churn batch after batch without pre-freezing, making them practical but more costly. Perfect for occasional use or small batches, hand-crank machines are manual and require physical effort. For everyday dessert preparation, compressor models are typically the simplest to use.
Mix Your Base Ingredients Properly
The quality of your base mix determines the quality of your ice cream. Typically, recipes call for a combination of milk, cream, sugar, and seasonings, occasionally with egg yolks to form a custard foundation. Before churning, make sure your base is completely chilled for the greatest results. An improperly warm foundation can destroy the equipment since it won’t freeze correctly. Make your mixture ahead of time and chill it for at least four hours or even overnight. It’s important to do this step to get a smooth, creamy texture and cut down on how long the machine has to churn.
Before churning, chill everything
It is crucial to chill all other ingredients before churning, in addition to chilling your base mixture. Make sure the bowl has been in the freezer for the suggested amount of time if you’re using a pre-freeze model. Refrigerate any mix-ins, like chocolate chips, fruit, or nuts, before adding them. Even the container in which you plan to store the completed ice cream should be pre-chilled. By carefully regulating the temperature, the ice cream may freeze quickly and evenly, yielding a better texture and consistency.
According to the Manufacturer’s Instructions, Churn
It’s crucial to follow the manufacturer’s directions because every ice cream maker works a little bit differently. Between twenty and forty minutes are needed for most machines to produce a batch of ice cream. During this period, as air is integrated, the mixture ought to thicken and expand in volume. Over-churning should be avoided because it might make the ice cream excessively firm or buttery. Use your timer if your device has one. Verify the consistency frequently otherwise. Once the ice cream has a soft-serve consistency, it is ready.
At the appropriate time, add mix-ins
Your ice cream will have more texture and taste if you use mix-ins like crushed biscuits, nuts, chocolate chips, and fruit bits. But if you add them at the wrong moment, they may either sink to the bottom or be crushed by the rotating paddle. The optimal time to add mix-ins is after the ice cream has finished churning and is being transferred to a container, or during the last 5 minutes of churning. By doing this, the mix-ins are uniformly distributed without deteriorating.
Freeze to enhance the texture
The ice cream will have a soft-serve consistency once it has been churned. Freeze it for two to four hours after transferring it to a pre-chilled airtight container if you want a harder texture. This gives the ice cream time to harden and reach its full flavour potential. To prevent the formation of ice crystals, press a piece of cling film right onto the ice cream’s surface before freezing. Although it is ideal to consume the ice cream within the first few days, it may be kept in the freezer for up to two weeks.
Conclusion
With little effort and the greatest flavour, a machine that makes ice cream makes it simple to make delectable homemade frozen delights. By choosing the proper equipment, laying the foundation correctly, and taking a few simple steps, you may savour creamy ice cream, cool sorbets, and frozen yoghurts whenever you want. The possibilities are endless, ranging from traditional tastes to creative experiments. Making homemade ice cream is guaranteed to be a hit with everyone, whether you’re making it for yourself, your family, or visitors. You can always have a quick dessert on hand if your ice cream machine is on the counter.
Visit bushwood for more informative blogs.